
Welcome to my weekly post for the My Cricut Craftroom design team!
Today one of the project options for the team was to use the Cricut Cartridge called "A Child's Year". I have had this cartridge for quite some time and I enjoy using it. I really like the feature cuts but also find so many fun images on some of the other feature keys.
I was very lucky to have a sweet friend and fellow design team member, Shelley Peeler of /http://shelley-scrapbookingforfun.blogspot.com/ who is not only is a talented paper crafter but she makes a line of bath and body products as well. We were chatting one evening and she so very kindly offered to GIFT me with a few "treats" from her online store (which can be found here - http://perfectscentsforyou.blogspot.com/). You will want to go and see the bath salts, the candles and the lotions she makes!
To thank Shelley, I made a card for her using the "A Child's Year" cartridge but switched it up a bit. Most people use black to make the silhouette figures of the children which make up the main feature images on this cartridge. I like the black shadow type figures for some projects, but recently I have decided to layer color on top of the black silhouettes and give a pop of color!


To begin my design, I wanted to do something a bit different that just a plain flat card, so I remembered I had not made any Easel Cards for a while. Months ago, I found a great tutorial on the site called
Splitcoaststampers (here is the direct link: http://www.splitcoaststampers.com/resources/tutorials/easelcard/).
I had to refresh my memory on how to make it so I went back to this fabulous resource!
After I made the base of the easel card... I cut the image found on page 75 of A Child's Year Booklet and cut that main feature in black at 3 inches.
I repeated the same cut, using a shimmery white paper and then again using a yellow paper.
I hand trimmed out the "bubbles" from the while image, and then ran it through the CuttleBug with the "Tiny Bubbles" embossing folder. (If you are interested in this embossing folder it can be found at Erica's Store right here : http://www.shop.ericascraftroom.com/Cuttlebug-Emboss-Folder-Tiny-Bubble-37-1229-Cuttlebug-Tiny-Bubble.htm?categoryId=-1).
After spraying the white bubbles with a bit of Sheer Glimmer Mist, I then glued it on top of the black silhouette.
With my yellow version, I again hand trimmed just the cute little rubber duckie and also layered it on the main figure.
Using the Icon Feature key on Page 75 of A Child's Year, I then cut out two rubber duckies out of yellow, flipping one of the images so my ducks could face each other on the base of the easel card. I wanted the ducks to be what would hold the "easel" portion of the card up ... so I pop dotted them after I did a bit of hand drawn decorating for eyes, beaks and feathers and also inked the edges in White ink.


I hope you enjoy it and that you know I am so very thankful for your friendship and your kindness!
Believe me...it's been a week where I am ready to enjoy those bath salts!


Splitcoaststampers (here is the direct link: http://www.splitcoaststampers.com/resources/tutorials/easelcard/).
I had to refresh my memory on how to make it so I went back to this fabulous resource!
After I made the base of the easel card... I cut the image found on page 75 of A Child's Year Booklet and cut that main feature in black at 3 inches.
I repeated the same cut, using a shimmery white paper and then again using a yellow paper.
I hand trimmed out the "bubbles" from the while image, and then ran it through the CuttleBug with the "Tiny Bubbles" embossing folder. (If you are interested in this embossing folder it can be found at Erica's Store right here : http://www.shop.ericascraftroom.com/Cuttlebug-Emboss-Folder-Tiny-Bubble-37-1229-Cuttlebug-Tiny-Bubble.htm?categoryId=-1).
After spraying the white bubbles with a bit of Sheer Glimmer Mist, I then glued it on top of the black silhouette.
With my yellow version, I again hand trimmed just the cute little rubber duckie and also layered it on the main figure.
Using the Icon Feature key on Page 75 of A Child's Year, I then cut out two rubber duckies out of yellow, flipping one of the images so my ducks could face each other on the base of the easel card. I wanted the ducks to be what would hold the "easel" portion of the card up ... so I pop dotted them after I did a bit of hand drawn decorating for eyes, beaks and feathers and also inked the edges in White ink.


I layered my cute ducks on another layer of bubbles which were also cut from
A Child's Year on page 75, this time using the Shift button of the main image. I hand trimmed the child figure out and just used the bubbles of this image! Got to think out of the box sometimes!
I did not want my bathtub to appear to be just floating on the card,
so I hand cut a little throw rug and embossed it to ground the image a bit.
I think this makes my card look just like a bathroom!

The front of my card needed a sentiment. I wanted this to look like it was a
wall hanging on the bathroom wall - so I created what I felt looked like a little piece of
framed wall art with the THANK YOU stamp ( from the Close To My Heart sentiment stamp set called
"Say It In Style"). The shaped image was cut from the Cake Basics Cartridge on page 33 using the Plain Base Blackout feature key and cutting at 1 inch.

I used a blue ink that really tied in well with the blue stripes in my background paper (which made me think of wall paper!) for both the sentiment and inking around the edges. My camera has not been co operating with me of late and my close up images leave a lot to be desired. I am in the process of checking out new cameras!
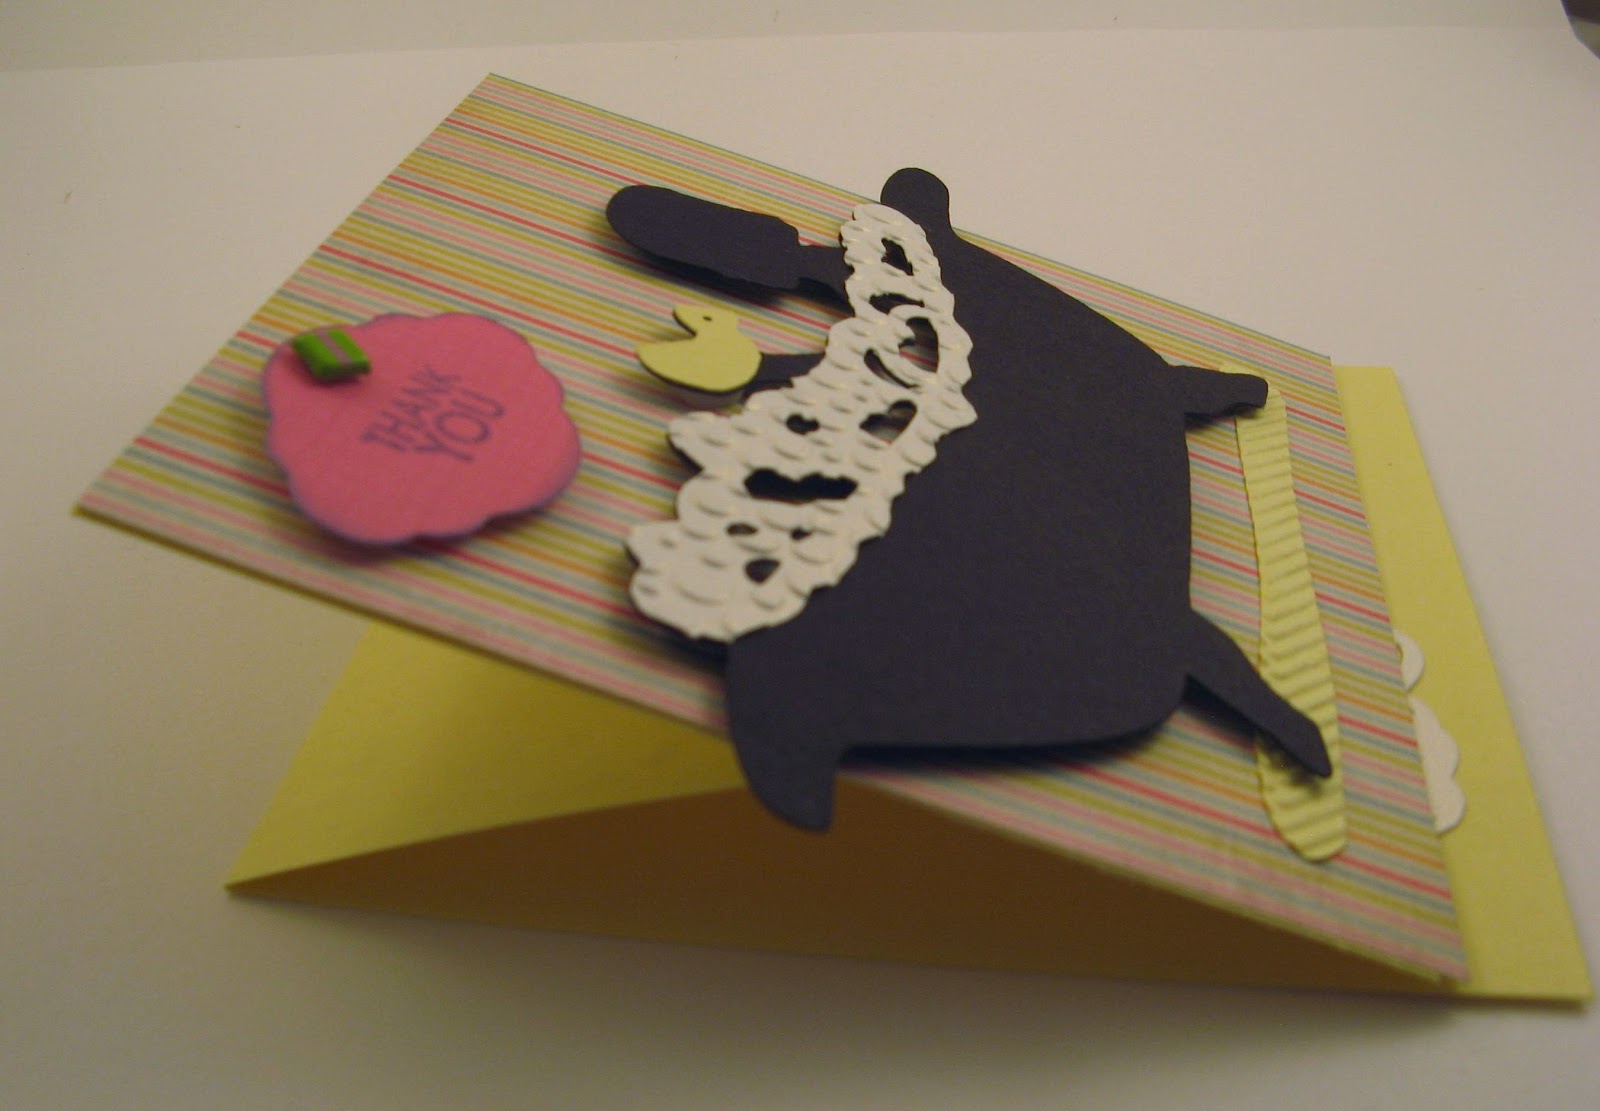
If you visit my blog very frequently, you know I am very fond of giving dimension to my projects...so I foam dotted the "Thank you" sign as well as the bathtub image (and I already told you I pop dotted the ducks!).
The following two images are showing a couple of side views of the cards - to help you see how they stand up and what a fun change they are instead of always having just a flat card!

So, there you have it!
Shelley, this will be on it's way in the mail to you now that it has made it's debut online!I hope you enjoy it and that you know I am so very thankful for your friendship and your kindness!
Believe me...it's been a week where I am ready to enjoy those bath salts!

Please stop by and visit My Cricut Craftroom
to see what fun projects my fellow design team sisters have
created for this week.
Have a wonderful week and stay cool!!
Thank you so much for stopping by and I so enjoy hearing from you! Please leave some "love" so I know you were here!


22 comments:
Such a cute "thank you" card Teresa! Love all of the little details you added! I am sure Shelley will love it! :)
Hugs,
Heather Lynn
MCCR DT Sister
Oh Teresa! This card is so sweet! Love the bubbles layer..definitely gives the card more depth! Good thinking! And..I am a big fan of the easel card! :)
Amy
MCCR DT
I love this card!! Its so cute! This was my first time using my cart! You did an awesome job!
super cute card
rosiemini@gmail.com
www.scraplovingminis.blogspot.com
Oh my goodness!! This card is awesome. I love it!! Great job!!
Tasha
MCCR DT Member
Scrapbrat07.blogspot.com
cute card teresa! i love the details, the white bubbles, the rug, definitely adds to the cards.
TFS!
ClaireR
Great card Teresa!! Love the pop of color and the embossing.
Kathy
My Cricut Craft Room Design Team
http://3spoileddogs.blogspot.com/
leaping easels, batman! This card is amazing, it's 3D and beautiful! Great series of step-by-step instructions. You are truly leaping easels, batman! WE LOVE YOU TERESA - the Arizonies...
Super Cute!
Miranda :)
MCCR DT Sister
www.nanasscrapspot.com
Teresa, I think the added pop of color suits this card well...I love the bubble embossing you did and like how you set the duckies up to hold the card upright! Fabulous job!!!
:O)
Jessica S
I love this card! Such detail!!
Lisa
MCCR DT
Great card Teresa, I love how you did the bubbles.
Very very adorable! Love everything about ur card!
MCCR DT, Lisa Ch
Teresa this card is wonderful. I love the embossing on the bubbles and yes it looks like a bathroom! I'll have to check out Shelley's store. Hugs~Mary
Great card Teresa! I just love all the details!
Andrea
MCCR Design Team
http://creativedesignsbyandrea.blogspot.com
Love the tent card element of your card! Not to mention the card itself! All the details are just lovely.
MCCR DT Sister
Nadja
I said it yesterday and I'll say it again.. cute, cute, cute!! Love it!
Janet-MCCR Design Team
Adorable card!!! Thank-you Teresa you are a sweet heart!!
Shelley MCCR DT
Just adorable Teresa! Just adorable. I never would of thought of a card like that with that cartridge.
Tess
MCCR DT sis
This card is truly sweet and special. Love it. DT sis L.B.
Adorable!
Making your own cards allows for such wonderful features. So thoughtful of you ro create a bathtub full of Shelley's bubbles for thanking her. You both shared your work with each other! What a great way to build on your DT friendship!
Post a Comment
I love to hear your thoughts!